3D Glasses with Perspective Origin
This is the fifth article in a series discussing different optical illusions & mechanical toys and how we can recreate them on the web (and learn from them). Unlike the other articles in this series, the full effects require a physical item — specifically a pair of 3D Glasses with the red and cyan lenses or a Google Cardboard.
The classic-looking red-cyan 3D glasses have been around for about a century, and we can build their corresponding images on the web with a little help from 3D Transforms, perspective, and blend modes.
See the Pen 3D Glasses / Google Cardboard Toggle - Black on White by Dan Wilson (@danwilson) on CodePen.
Anaglyphs and Blend Modes
A few years ago, Una Kravets wrote a great article about how you can use blend modes to create your own 3D images - known as anaglyphs. We can take two images, and apply a cyan screen to one and red to the other. These images are then overlayed. The 3D glasses force one eye to see one image, the other eye sees the other image, and the brain does its magic to create apparent depth.
The key to a successful anaglyph is a change in perspective for the images. You can take an photo with a camera having the viewfinder at your left eye (assuming that your camera still has an eye-level viewfinder). Then you can move the viewfinder to your other eye and take the photo again. Your two images will be fairly similar except a slight change in perspective has happened as each eye has a slightly different viewing angle of your subject.
These images can then be placed on top of each other with the appropriate red and cyan screens applied. How far apart the different colors are at given points in the image determines the perceived depth.
Not everyone has the luxury of a viewfinder
We don’t even need a camera, because on the web we have 3D Transforms... with built-in perspective. As objects in a line get further away (such as with a negative translateZ value) they appear smaller and ultimately resolve towards a vanishing point, giving us perspective for a given scene.
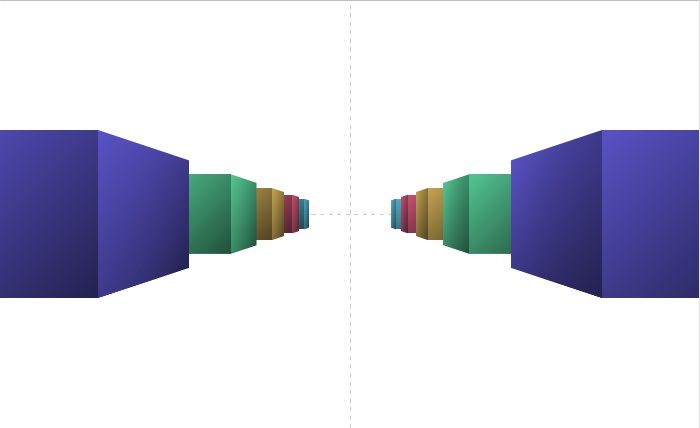
Individual elements can share the same 3D space, and they can therefore also share the same perspective. We can set our perspective property with a length value that ultimately shows how exaggerated our 3D depth effect is. By default our effective vanishing point is in the center of the 3D space. However, we have ways to control this point via the perspective-origin property. With the exact same transform value we can get very different looking scenes by changing only our perspective-origin.

perspective-origin values of 20% 50%, 50% 20%, and 80% 80%. Explore more in the live perspective-origin demo.Doubling the perspective
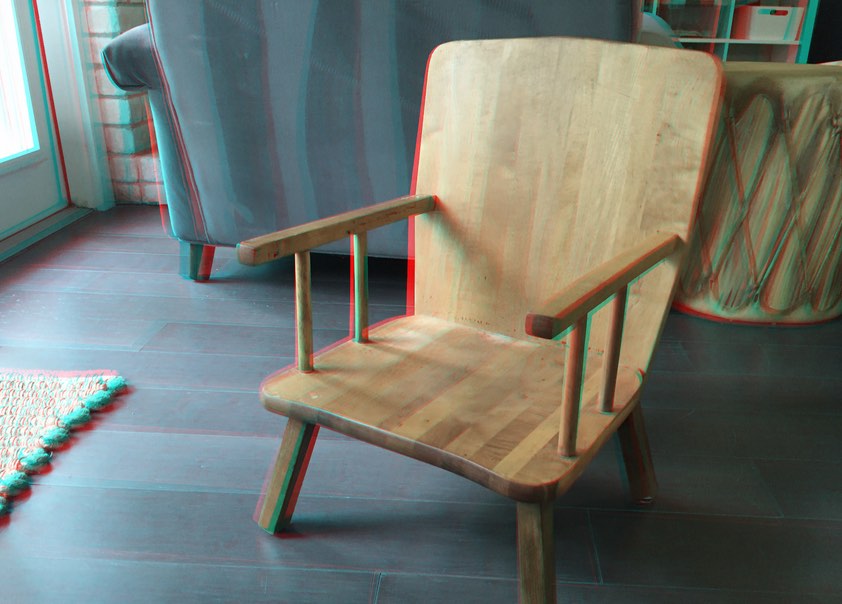
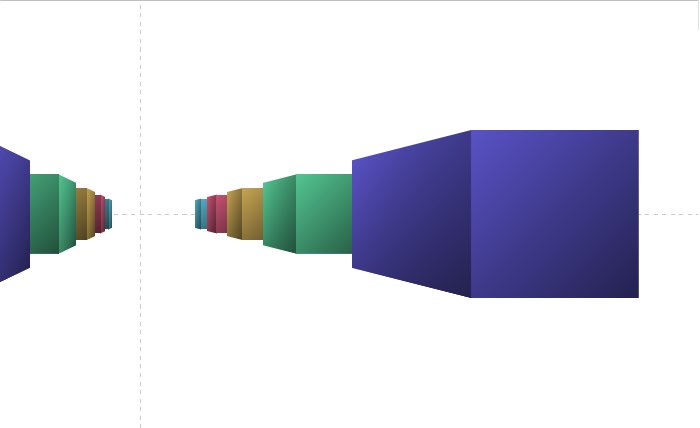
Much like we can take two photos from a slightly different perspective, we can create two scenes and adjust the perspective slightly. We can set up two containing scenes — one for our left eye and one for our right eye. We will give each scene the same perspective value, and each object within each will have the same transforms applied as their duplicated counterpart in the other scene. All objects can share their respective scene’s shared 3D space via transform-style: preserve-3d.
The only difference in the compososition of the scenes will be the perspective-origin. We can set one to be slightly greater than center horizontally, and the other to be slightly less. With CSS Variables (Custom Properties):
.scene {
  perspective-origin: var(--origin-x) 50%;
  perspective: 20vmin;
  --diff: 6px;
  --origin-x: calc(50% - var(--diff));
}
.scene:nth-of-type(2) {
  --origin-x: calc(50% + var(--diff));
}
The 6px is a value I chose after some experimenting, though there is surely a more mathematical way to choose that based on distance between the eye and the screen. Other values produce slightly different effects, so it’s worth exploring the difference with other values.
Filtering for the eyes
Now that we have two overlapping scenes with a slightly different perspective, the second biggest piece of the puzzle is making sure each eye can only see the appropriate scene through the 3D glasses. It is time to create the anaglyph. We will assume our glasses have the red lens on the left eye.
Which color goes where depends on if you want to create a dark foreground with a light background or the inverse.
For starters, let’s assume we have black outlines on a white background. If you are using basic shapes and outlines you can set the red and cyan colors directly on your elements. The elements in your left scene get cyan, the right ones get red. Then we apply a mix-blend-mode: multiply to the scenes. This will make any area where the red and cyan overlap turn black. When looking through the red lens, your eye will be able to see anything that is black or cyan, and your other eye will only see the red and black through the cyan lens. This relies on the same blend mode math as the Red Reveal lens effect.
See the Pen 3D Glasses / Google Cardboard Toggle - Black on White by Dan Wilson (@danwilson) on CodePen.
If you want to have a white foreground on a black background, the colors are reversed — red on the left and cyan on the right. We also change our blend mode to a screen as it similarly looks at where cyan and red overlap and turns those areas white. Now your cyan lens will reveal everything that is cyan or white, and the red lens will reveal everything that is red or white.
See the Pen 3D Glasses / Google Cardboard Toggle by Dan Wilson (@danwilson) on CodePen.
If we want to work with more than just black and white, we can introduce additional blend modes. For a dark background, we will apply a cyan screen over our left scene, and a red screen over the second scene. This can be achieved with a cover for each scene of the given color and a mix-blend-mode: screen.
Then, to make sure the bottom image still shows through, we apply a mix-blend-mode: multiply to the whole top scene. This combination of blend modes lets you still make out how the original scene is supposed to look, and it gets that classic every-object-has-some-red-and-some-cyan look. The additional blend mode math in this case is similar to the discussion in constructing a Barrier Grid animation image.
.scene::after {
  content: '';
  position: absolute;
  top: 0;
  right: 0;
  bottom: 0;
  left: 0;
  z-index: 1;
  background: cyan;
  mix-blend-mode: screen;
}
.scene:nth-of-type(2)::after {
  background: red;
}
.scene:nth-of-type(2) {
  mix-blend-mode: multiply;
}
See the Pen 3D Glasses: Radical Mathematical - Basics by Dan Wilson (@danwilson) on CodePen.
Animating with 3D 3D Transforms
Since we are already positioning everything in our scene with 3D Transforms, we can even animate our scene and take further advantage of the perspective. Performance can be affected as we are doing duplicate animations in a 3D space, and those animations are happening behind blend modes.
See the Pen 3D Glasses: Radical Mathematical by Dan Wilson (@danwilson) on CodePen.
Google Cardboard
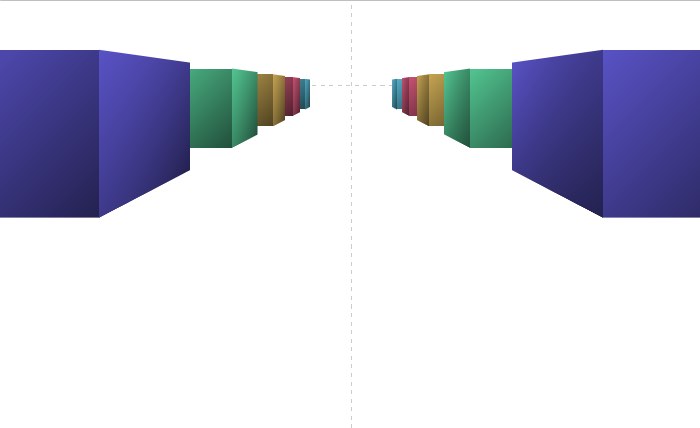
Even if you are unable to find a place to sell you cheap 3D glasses, you are in luck if you own a not-as-cheap-but-still-not-exorbitant version of Google Cardboard. It uses similar alignment of images based on altering viewing angles between the eyes. Except here the images are not overlayed, they appear side by side. This example uses the same perspective origin offset, and presents the two scenes side by side. They seem identical while they are apart, but the minor offset is just enough to give an additional illusion of depth when palced inside a Cardboard device.
See the Pen Google Cardboard: Cube by Dan Wilson (@danwilson) on CodePen.
Rest assured: If as a society we figure out how to fit two tiny web browsers inside a classic View-Master reel then I will update this article as it could use similar perspective origin magic.